The constant odour in the hallway or the cooking fumes filling up the kitchen has always been a trouble. Even the vapours from your bathroom and steam from the kitchen could lead your door to warp or the paint to fall off the wall. Installing an exhaust fan has always been a great idea for home dwellers, whether they are struggling with suffocation issues in compact spaces or are afraid of mould spores. Improved ventilation is more than a necessity and exhaust fans come as a handy solution. However, installing these in your home is not up everyone’s alley! That doesn’t mean you have to worry about finding the right person to install it, either. It is easy to do it yourself if you have some tricks up your sleeve. Explore this guide to learn how to install an exhaust fan using a step-by-step process.
Understanding Exhaust Fans and their Specific Installation
Before you plan to buy exhaust fan, it is important to understand what is the most suitable option for your setting. These are commonly available in multiple types based on the type of application and objective.
| Exhaust Fan Type | Suitable Place | Purpose |
| Ceiling-Mounted Exhaust Fan | Bathrooms, laundry rooms, Kitchen | Helps remove odour and moisture from highly humid areas |
| Wall-Mounted Exhaust Fan | For compact spaces like small rooms and utility closets | It offers good ventilation in the place and often works combined with ceiling fans. |
| Window- Mounted Exhaust Fan | Installed in window frames | An affordable option used to offer air circulation in rooms where there is no ventilation |
Tools Required For Exhaust Fan Installation
Ensure you have these necessary tools and materials in your kit when installing an exhaust fan in your environment.
- The exhaust fan you need
- Screwdriver
- Wire cutters
- Drill
- Safety Goggles
- Electrical tape
- Gloves
- Wire nuts
- Level
- Measuring Tape
Safety Precautions
- Always turn off the power in the house before beginning any electrical work.
- Use gloves and safety glasses when working with power tools during exhaust fan installation.
- Adhere to the instructions given in the manufacturer’s guide for enhanced safety and effective installation.
Master Exhaust Fan Installation With Step-by-step Guidance
Here is the detailed step-by-step process for installing an exhaust fan in your bathroom, kitchen, room or other spaces.
Step 1—Prepare the Location:
Analyse the spot where your exhaust fan should be placed. For example, it is ideal to place it near the shower or tub area in the bathroom as it will help remove moisture efficiently. Meanwhile, when installing it in the kitchen, place it above the cooking area. Mark the spot with a pencil or marker and ensure the area has a ceiling or wall to facilitate ventilation.
Step 2—Draft the Opening for the Exhaust Fan:
The next step is to create a hole in the wall that fits your fan size. Mark the area and drill pilot holes. Cut out the fan opening with the help of a saw.
Step 3— Installing
After you have cut out the fan opening, begin the process of installing the housing of the exhaust fan. Fit the housing carefully into the opening, ensuring that it’s snug and levelled perfectly with the ceiling or the surrounding wall. Attach it with the help of screws or mounting brackets. However, if your housing has ductwork, use duct tape to fix it in the venting system.
Step 4— Wiring The Exhaust Fan:
Turn off the power in the circuit when beginning to wire the fan. Start matching the wires with the appropriate colours: black/red(live), green(ground) and white (neutral) and connect the exhaust fan to the electrical system. Lastly, secure it with electric tape and wire nuts.
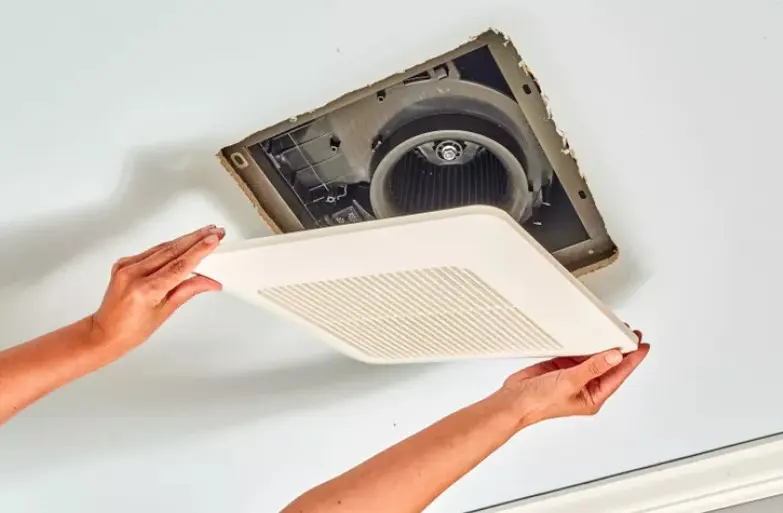
Step 5— Fix Fan Cover and Grill:
Affix the grill and fan cover to the housing with screws or just by snapping it into place. Make sure it is tightly secure and well-aligned before proceeding with the next step.
Step 6— Testing the Exhaust Fan:
Since the installation is completed, consider testing it to gauge whether it works well and ensure all components are in place. Turn on the power both in the circuit break and on the fan switch. Check whether you can hear any vibrations or odd sounds, which could be due to some loose fixing issue. If that happens, see the manufacturer’s instructions or quickly check the installation steps to see if it’s all done right. However, if your exhaust fan runs smoothly and gives effective ventilation, then you have completed your installation process.
Step 7— Seal Gaps, if Any:
Consider sealing the spaces around the fan housing and grill with silicone sealant or other materials, as this would prevent air leaks. Further, it also improves energy efficiency and ensures the exhaust fan runs well.
Conclusion
You do not always have to call an electrician to install an exhaust fan in your home or office when the trick lies in just a few efforts from your end! DIY the installation process through this easy guide and save those extra bucks. Invest in exhaust fans from reputable sources as it promises premium quality and can last longer than a low-priced electric item.
Also read-The Ultimate Pre-Sale Checklist: Get Your Home Ready for the Market